Why Your Resin Miniature Print Failed: 10 Common Causes and Fixes
Resin stuck to FEP, supports detaching, melted detail, warped bases: 10 miniature print failures diagnosed by symptom with exact settings fixes for each.
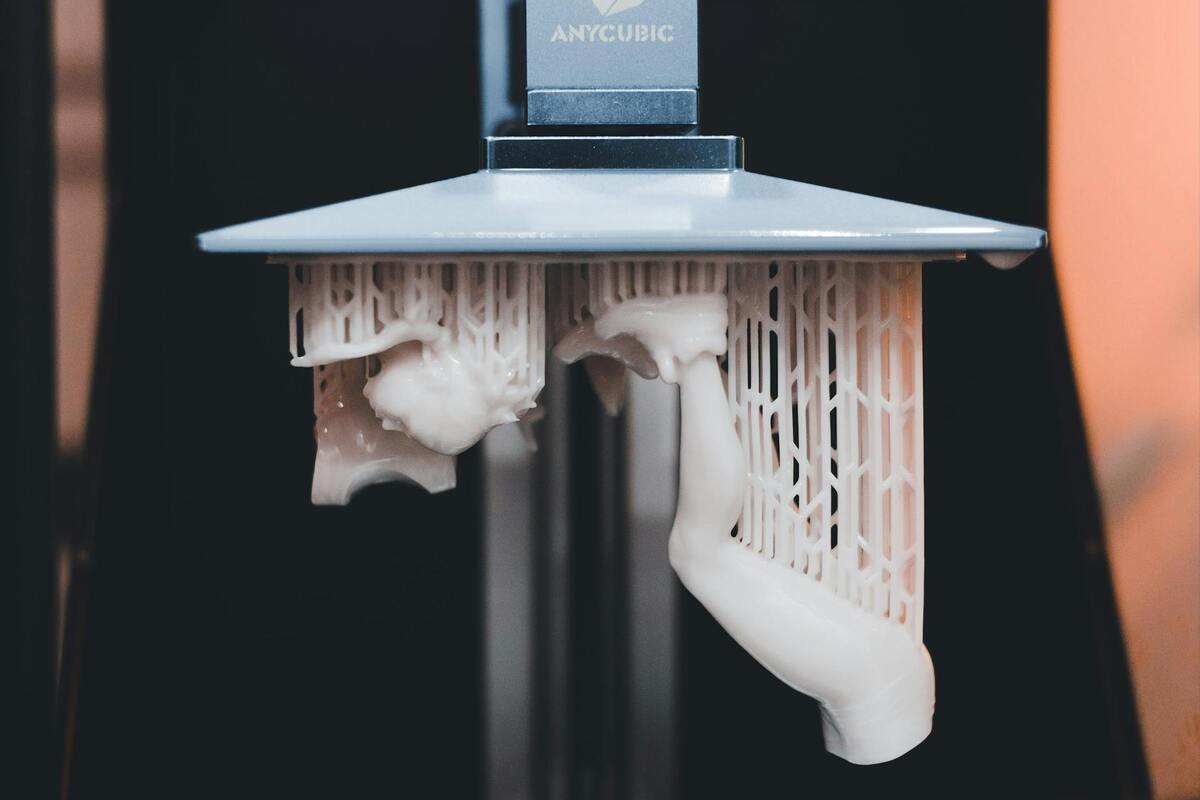
This guide contains affiliate links. We may earn a small commission at no extra cost to you.
You started the print, walked away, came back, and found a disaster. A pile of failed layers stuck to the FEP. A raft with nothing on it. Half a miniature that stopped printing mid-model. Or 30 shapeless blobs where detailed infantry should be.
Resin print failures feel random. They’re not. Every failure mode has a specific cause. Once you can identify it, you can fix it systematically rather than just re-printing and hoping.
This guide covers the 10 most common resin miniature print failures and the exact steps to resolve each one. Before diving in, make sure you’ve reviewed the complete beginner’s guide to resin printing if you’re still getting started. And once you’ve sorted your failures, the resin printing safety guide is worth a read. Exposure to uncured resin during cleanup is where most people cut corners.
1. Nothing Printed: Cured Resin Stuck to the FEP
You open the printer and find a cured disc or blob stuck to the FEP film at the bottom of the vat. Nothing on the build plate. The print started but never attached.
Cause: The build plate wasn’t close enough to the FEP during the first few layers, so the initial layers cured on the FEP instead of adhering to the plate. Or the build plate surface is contaminated or smooth to the point of being non-stick.
Fix:
- Remove the cured piece from the FEP carefully using a plastic scraper. Don’t use metal; it will scratch or puncture the film.
- Re-level your build plate. This is the most common root cause. Even a fraction of a millimeter too far from the FEP means the first layers cure in free space and stick to whatever is closest, which is the film.
- Check the build plate surface. If it’s glossy or overly smooth from over-cleaning, scuff it lightly with 400-grit sandpaper. The texture gives the resin something to grip.
- If re-leveling doesn’t solve it, increase your bottom layer exposure time by 5 seconds and add 2 more bottom layers. This extends the initial cure cycle and ensures the raft fuses firmly.
2. Print Stops Mid-Way: Partial Model on the Plate
The raft printed fine, a few layers are visible on the build plate, but the model stops at some point and what’s left is either incomplete or a smooth stub.
Cause: An unsupported section started printing after the last supported layer, couldn’t maintain its own weight against the peel forces, and snapped off into the vat. The layers after that point printed onto nothing.
Fix:
- Look at where the failure occurred. The break point is the first unsupported layer. Above that, the model had no structural anchor.
- In your slicer, check support placement at that exact layer height. Zoom in and look for islands (unsupported sections flagged in Lychee’s analysis mode). Add supports to any island.
- For flying models, extended horizontal poses, and any thin horizontal geometry: increase support density. The default auto-support preset may not be adequate for complex geometry.
- After re-supporting, run a full slicer analysis before printing again. Your target is zero islands.
The guide to adding supports for resin miniatures has the full walkthrough on placement and density for miniature-specific geometry.
3. Supports Printed, But Model Didn’t: “Spagetti” Supports
The supports printed cleanly. The plate has a forest of support columns. But where the model should be, there’s nothing. Or there are thin strands of cured resin trailing off the support tips.
Cause: The model was over-exposed at the raft and bottom layers, but the normal layer exposure is too low to cure the miniature geometry at the support tips. Or the model was placed at an orientation where the first layers of the actual model are extremely thin (thinner than a single layer height) and they failed to cure.
Fix:
- Increase normal exposure time by 0.2–0.3 seconds. Run a calibration print (Ameralabs Town file works well) to confirm your exposure is in range for your specific resin batch. The resin exposure test guide walks through that print step by step and what to look for on the result.
- Check model orientation. If the miniature is oriented perfectly horizontal, the first actual model layers are paper-thin slices of the bottom surface. Tilt the model 15–30 degrees so the first layers of the actual model are a meaningful cross-section, not a vanishing slice.
- Check whether the resin has separated in the vat. Resin pigments settle over time. Stir thoroughly (not vigorously, you don’t want bubbles) before every print session.
4. Detail Loss: Faces Look Melted, Fine Features Merged
The print completed successfully, but faces look undefined, thin details like fingers or weapon tips are fused, and raised texture that looked sharp in the preview is soft or merged on the actual print.
Cause: Over-exposure. The UV is curing the resin further than the intended boundary of each layer, bleeding into adjacent geometry and causing features to merge. This is the opposite problem from under-exposure and it’s subtler. Prints will look successful until you inspect the details.
Fix:
- Reduce normal exposure time by 0.2 seconds. Test. Inspect under good light.
- Check anti-aliasing settings. Aggressive anti-aliasing at the wrong settings can over-soften fine edges. Try reducing the AA level by one step.
- Check resin. If you’ve been using the same bottle for a while and it’s been exposed to ambient light or heat, the curing characteristics change. Fresh resin from a sealed bottle may need slightly different exposure than a partially used bottle that’s been sitting.
- For 4K printers: detail bleeding is more common than on 12K+ printers because the pixel pitch is larger. If you’re consistently losing fine detail, consider upgrading the layer height to 0.03mm. Finer layers reduce the total UV dose per surface area.
5. Warping: Flat Bases Curled Upward
The print finished, but flat sections (particularly bases and terrain) are warped. They curl up at the edges or bow in the middle when placed on a flat surface.
Cause: Differential curing stress. The bottom layers were exposed longer than the top layers, and the resin shrinks slightly as it cures. The bottom shrinks more than the top, causing the piece to curve toward the bottom.
Fix:
- Reduce bottom layer exposure. If you’re running 12+ bottom layers at 45+ seconds, try 8 layers at 35 seconds. The goal is enough adhesion to hold, not maximum possible cure time.
- Orient flat prints at an angle rather than laying them perfectly horizontal. A 20–30 degree tilt means no single layer is a large flat cross-section, which reduces the curing differential across the part.
- Post-cure warped pieces while holding them flat with weights or a flat plate over them. If the piece is still slightly green when it comes off the plate, light post-cure pressure can sometimes correct mild warping.
- For display bases and terrain: ABS-like resins warp less than standard resins. Siraya Tech Blu and similar flexible-tough formulations handle flat geometry better than brittle standard resins.
6. Print Detached from Supports Mid-Print
The supports are on the build plate. The model printed for a while. Then the model broke free from the supports and is either floating in the vat or printed sideways and failed.
Cause: The support tips didn’t bond adequately to the model at the connection point. Too short a tip, too small a contact area, or the model detached during a particularly aggressive peel cycle on a large layer.
Fix:
- Increase tip contact depth. In Lychee, go from 0.1mm to 0.15mm contact depth for the supports that failed. The deeper bite gives more bonding surface.
- Increase tip diameter from 0.3mm to 0.4mm on structural areas (heavy model sections, horizontal extremities). Keep 0.3mm for fine details where mark visibility matters.
- Add more supports. If the model had one support per area and it snapped, place two. Auto-generated supports on complex models are a starting point, not a final solution.
- Check for light-off delay in your print settings. Adding 0.5–1.0 seconds of light-off delay reduces the vacuum peel force on each layer cycle, which is the force that most commonly pulls models away from support tips on large layers.
7. Layer Separation: Visible Lines or Gaps Between Layers
The model looks okay from a distance, but up close you can see the layers: visible horizontal bands, surface stepping, or in worse cases, actual gaps where layers separated.
Cause (visible layers): Layer height is too coarse for the surface curvature of the model, or the anti-aliasing setting is too low. This is aesthetic, not structural.
Cause (actual layer gaps): Under-exposure. Adjacent layers didn’t cure enough to fuse. The bonds between layers are weak and may eventually fail.
Fix for visible layer lines:
- Reduce layer height from 0.05mm to 0.03mm for display pieces or highly curved models (faces, rounded armor).
- Enable or increase anti-aliasing in Lychee. Level 2–3 is appropriate for 4K printers; Level 1 for 12K+ printers.
Fix for actual layer separation:
- Increase normal exposure time. Layers that separate physically are under-cured. They didn’t receive enough UV to form strong inter-layer bonds. Before you rewrite your profile, check the room temperature: cold resin under-cures at settings that worked fine in summer, and resin printing in cold weather covers that failure mode specifically.
- Check FEP condition. A cloudy, scratched, or damaged FEP scatters UV light before it reaches the resin. Reduced effective UV dose causes under-cure. Replace FEP if it’s visibly fogged. I replace mine every 3–4 liters of resin printed. It’s a cheap maintenance item.
8. Suction Cup Failure: Print Pulls Off the Plate on Large Layers
This one happens with terrain, large bases, and multi-model plates. The first layers print fine. Then at some point, a large flat layer fails. The suction force during peel pulls the piece off the plate entirely, or causes a partial delamination.
Cause: Large flat cross-sections create significant vacuum force when the build plate lifts on each peel cycle. On a standard peel, the FEP peels away from the cured layer progressively (like peeling tape). On large flat sections, the entire surface releases at once. The force multiplies and can exceed the adhesion of the raft to the build plate.
Fix:
- Enable light-off delay: 1.0–2.0 seconds for large plates. This gives the resin time to properly solidify before the peel stress is applied.
- Use the anti-suction raft option in Lychee Pro. The perforated raft reduces the vacuum surface area.
- Reduce peel speed if your printer allows it. Slower peel = lower peel force. Most modern printers (including the Saturn series) allow peel speed adjustment in the print profile.
- If printing terrain or large bases: orient them at an angle to ensure no single layer has a massive flat cross-section.
9. Cured Resin at the Bottom of the Vat (FEP Failure)
You find thin cured resin flakes or chunks at the bottom of the vat, and when you check the FEP film, it has a milky or scratched patch.
Cause: The FEP film is damaged. It may have been scratched by a metal scraper, punctured by a cured resin fragment, or simply worn thin from use. Damaged FEP cures resin against itself rather than releasing it cleanly.
Fix:
- Do not continue printing with damaged FEP. The failure will repeat and could create resin debris that contaminates future prints.
- Replace the FEP sheet. Most Elegoo and Anycubic printers use standard FEP film that’s inexpensive and widely available. Replacement FEP film packs on Amazon are roughly $10–$15 for a multi-pack.
- When cleaning the vat, always use a plastic scraper on the FEP. Never metal. When straining resin back through a paint strainer to check for debris, do it before pouring back in, not by scraping at the FEP surface. The full routine is in how to clean your resin printer’s vat and FEP film.
- After replacing FEP, re-level the build plate before printing. FEP replacement changes the height reference by a fraction of a millimeter.
10. Good Print, But It Snapped After Removal
The print came out well: detail is clean, layers are solid, no failures. But when removing supports or during handling, the model snapped. Thin parts (sword blades, spear shafts, outstretched arms) broke off.
Cause: Standard resin formulations are brittle. This isn’t a print failure. It’s a material property. Most standard resins are designed for detail fidelity, not impact resistance. Thin features at 28mm scale have almost no cross-section and will snap under any lateral force.
Fix:
- Switch to an ABS-like resin for models you intend to play with. ABS-like resins sacrifice a small amount of surface crispness for significantly better flex and impact resistance. My go-to is Siraya Tech Blu. It’s noticeably tougher than standard resins on thin features without major quality loss at 0.05mm layer height.
- When removing supports, do it while the resin is in the “green state”: after IPA wash, before final UV cure. Uncured resin is more flexible and the supports snap away with less force than fully cured resin. Post-cure only after all supports are removed. See the IPA vs. resin cleaners guide if you’re deciding between wash mediums or dialing in wash timing.
- For extremely fragile poses (outstretched horizontal arms, long thin staffs): consider a metal pin armature. A 0.5mm steel rod through the center of thin features dramatically increases break resistance.
- For gaming pieces specifically: a coat of varnish helps, but won’t prevent snapping. Material choice is the real answer.
Troubleshooting Checklist
Before each print, run through this:
- Build plate level checked in the last 10 prints
- FEP film in good condition: not cloudy, no visible scratches or holes
- Resin stirred (not shaken) thoroughly
- Model sliced with zero islands in the slicer analysis
- Supports placed on all flagged points, manual review done
- Exposure time calibrated for current resin batch
- Print profile matches the model type (infantry vs. large creature vs. terrain)
Most failures come back to one of these. The checklist won’t catch every edge case, but it eliminates the common causes before they cost you a print. For the full nine-step version of this same list, with the reasoning behind each check, see the pre-print checklist.
For more on slicer settings that affect print outcomes, see the Lychee slicer settings guide for miniatures or the Chitubox settings guide for miniatures. For support-specific troubleshooting, the complete supports guide covers placement decisions in more depth. The resin printer accessories guide has a full list of the consumables worth keeping stocked, including FEP replacement film, paint strainers, and gloves.